
How to Turn Figma Designs into Working Prototypes with Claude Code
5 minutes to an engineering-ready prototype

Figma-to-code conversion is one of the core workflows I cover in my AI Prototyping course. If you want the full system for building prototypes that look and feel like your real product, the next cohort kicks off on April 20th. Use this link for 15% off!
In this post, I’ll cover how to leverage Claude Code to convert from Figma to code. Specifically, I’ll cover:
What MCP is and how the Figma MCP server connects to Claude Code
How to convert a Figma design into a working prototype with one prompt
Why that basic approach produces code your engineers can’t use
An advanced approach that produces code engineers can use
Let’s jump in!
What is MCP?
MCP (Model Context Protocol) is a translation layer that lets AI agents talk to other products. Claude Code, Cursor, ChatGPT, Codex, they can all use MCP to reach out to external tools and pull in information or take actions.
The Figma MCP server lets Claude Code read your designs directly from Figma. It pulls in screenshots, design context, exported assets, component information, all of the things Claude needs to understand what your design looks like and how it’s structured.
To get started, you need two things connected:
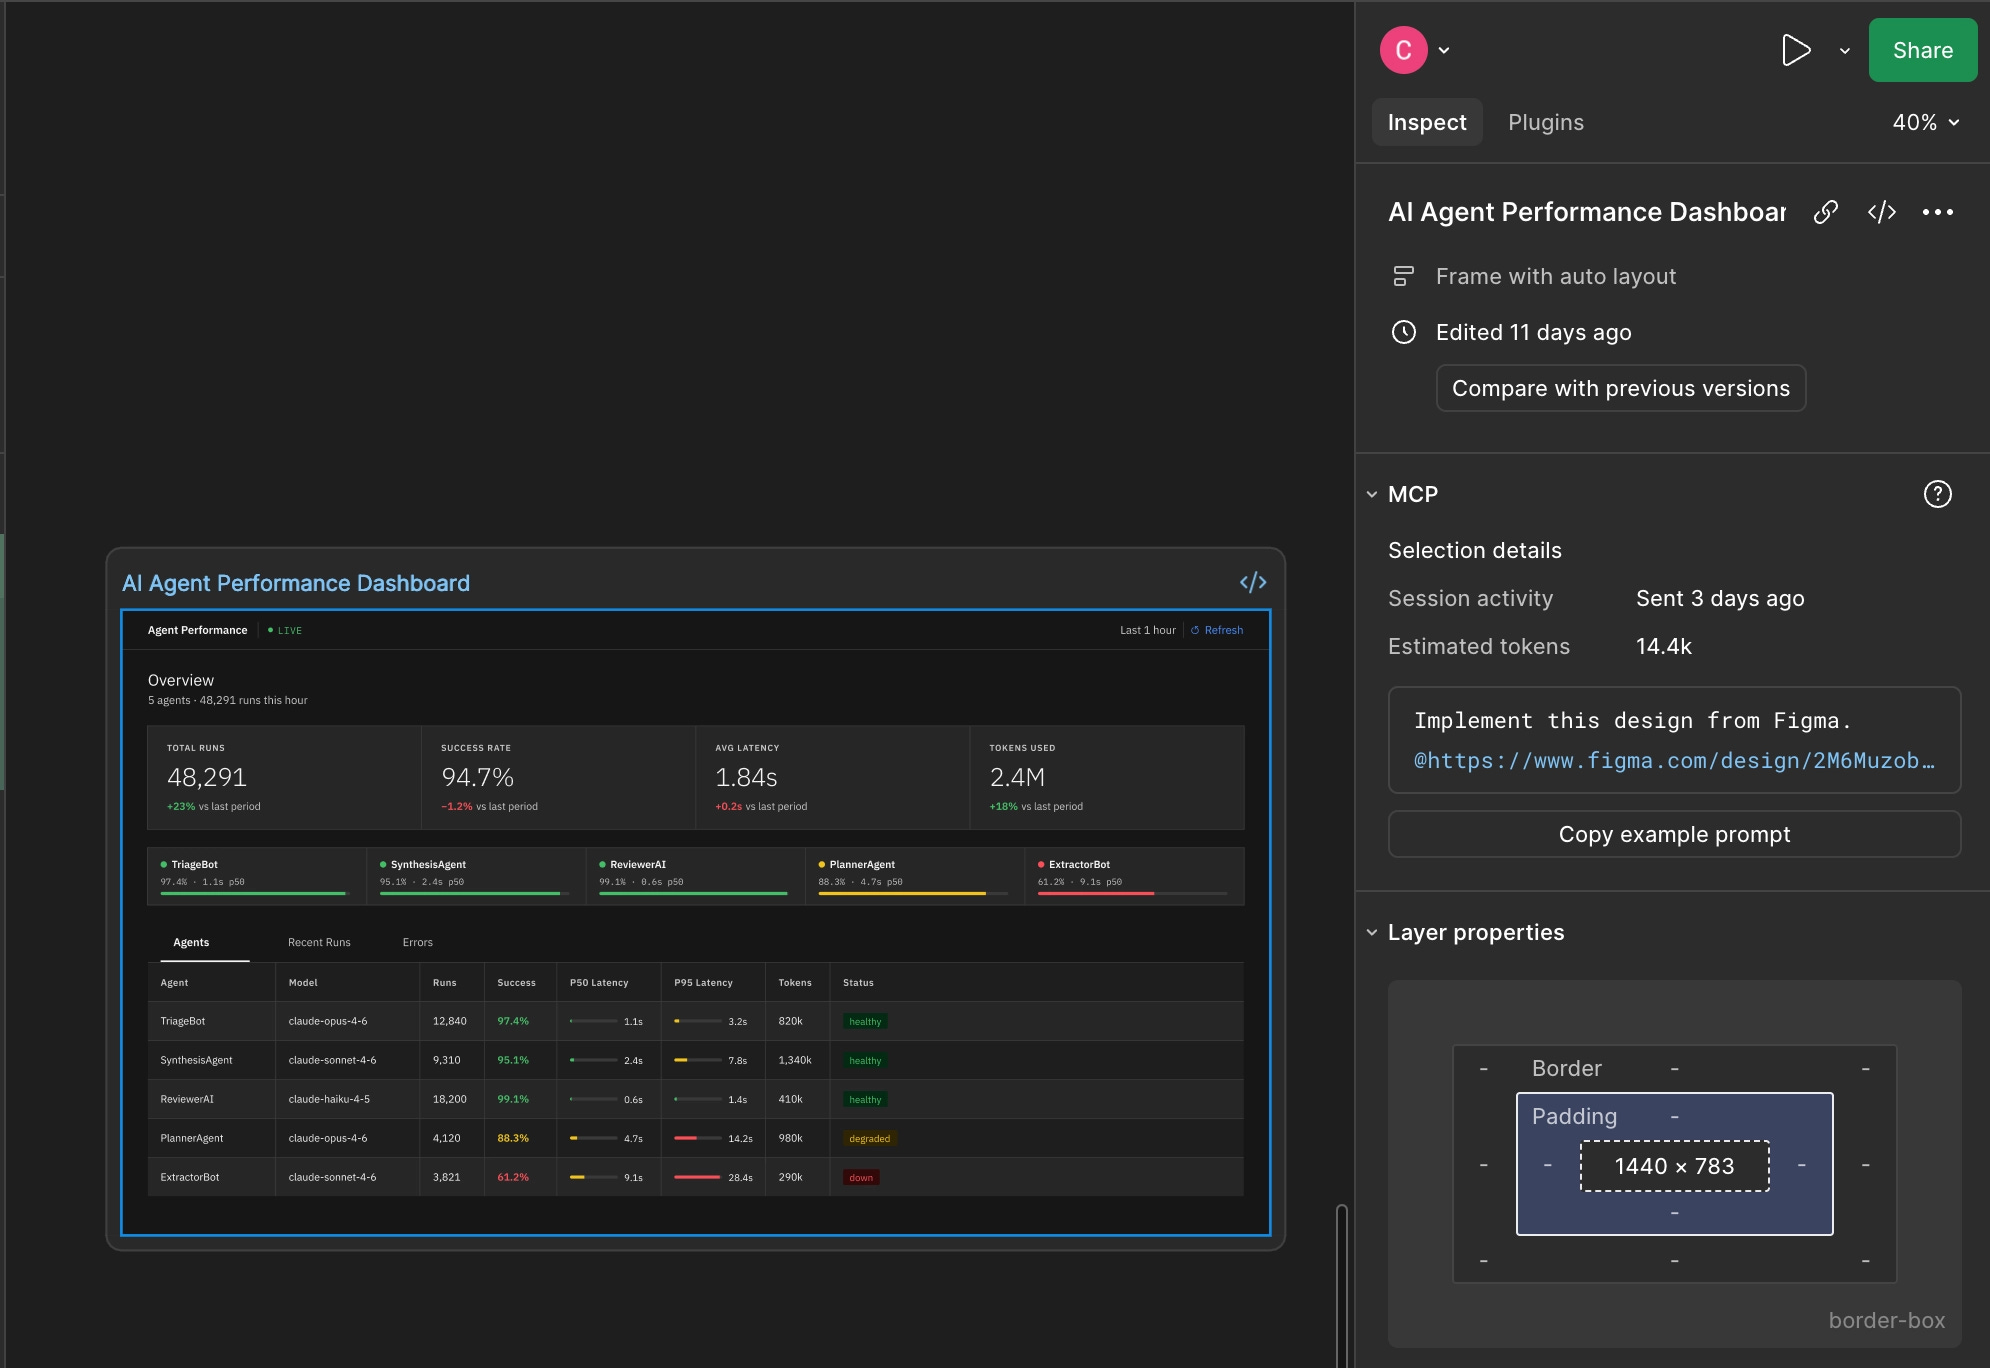
1) Figma: You need a full Figma seat with dev mode. In your design file, you’ll see an MCP option in the right panel when you enter dev mode. This tells Figma to make the design data available.
We’ll be using this dashboard design as our demo.
2) Claude Code: You need to add the Figma MCP server to Claude Code. You can follow the instructions here to set this up.
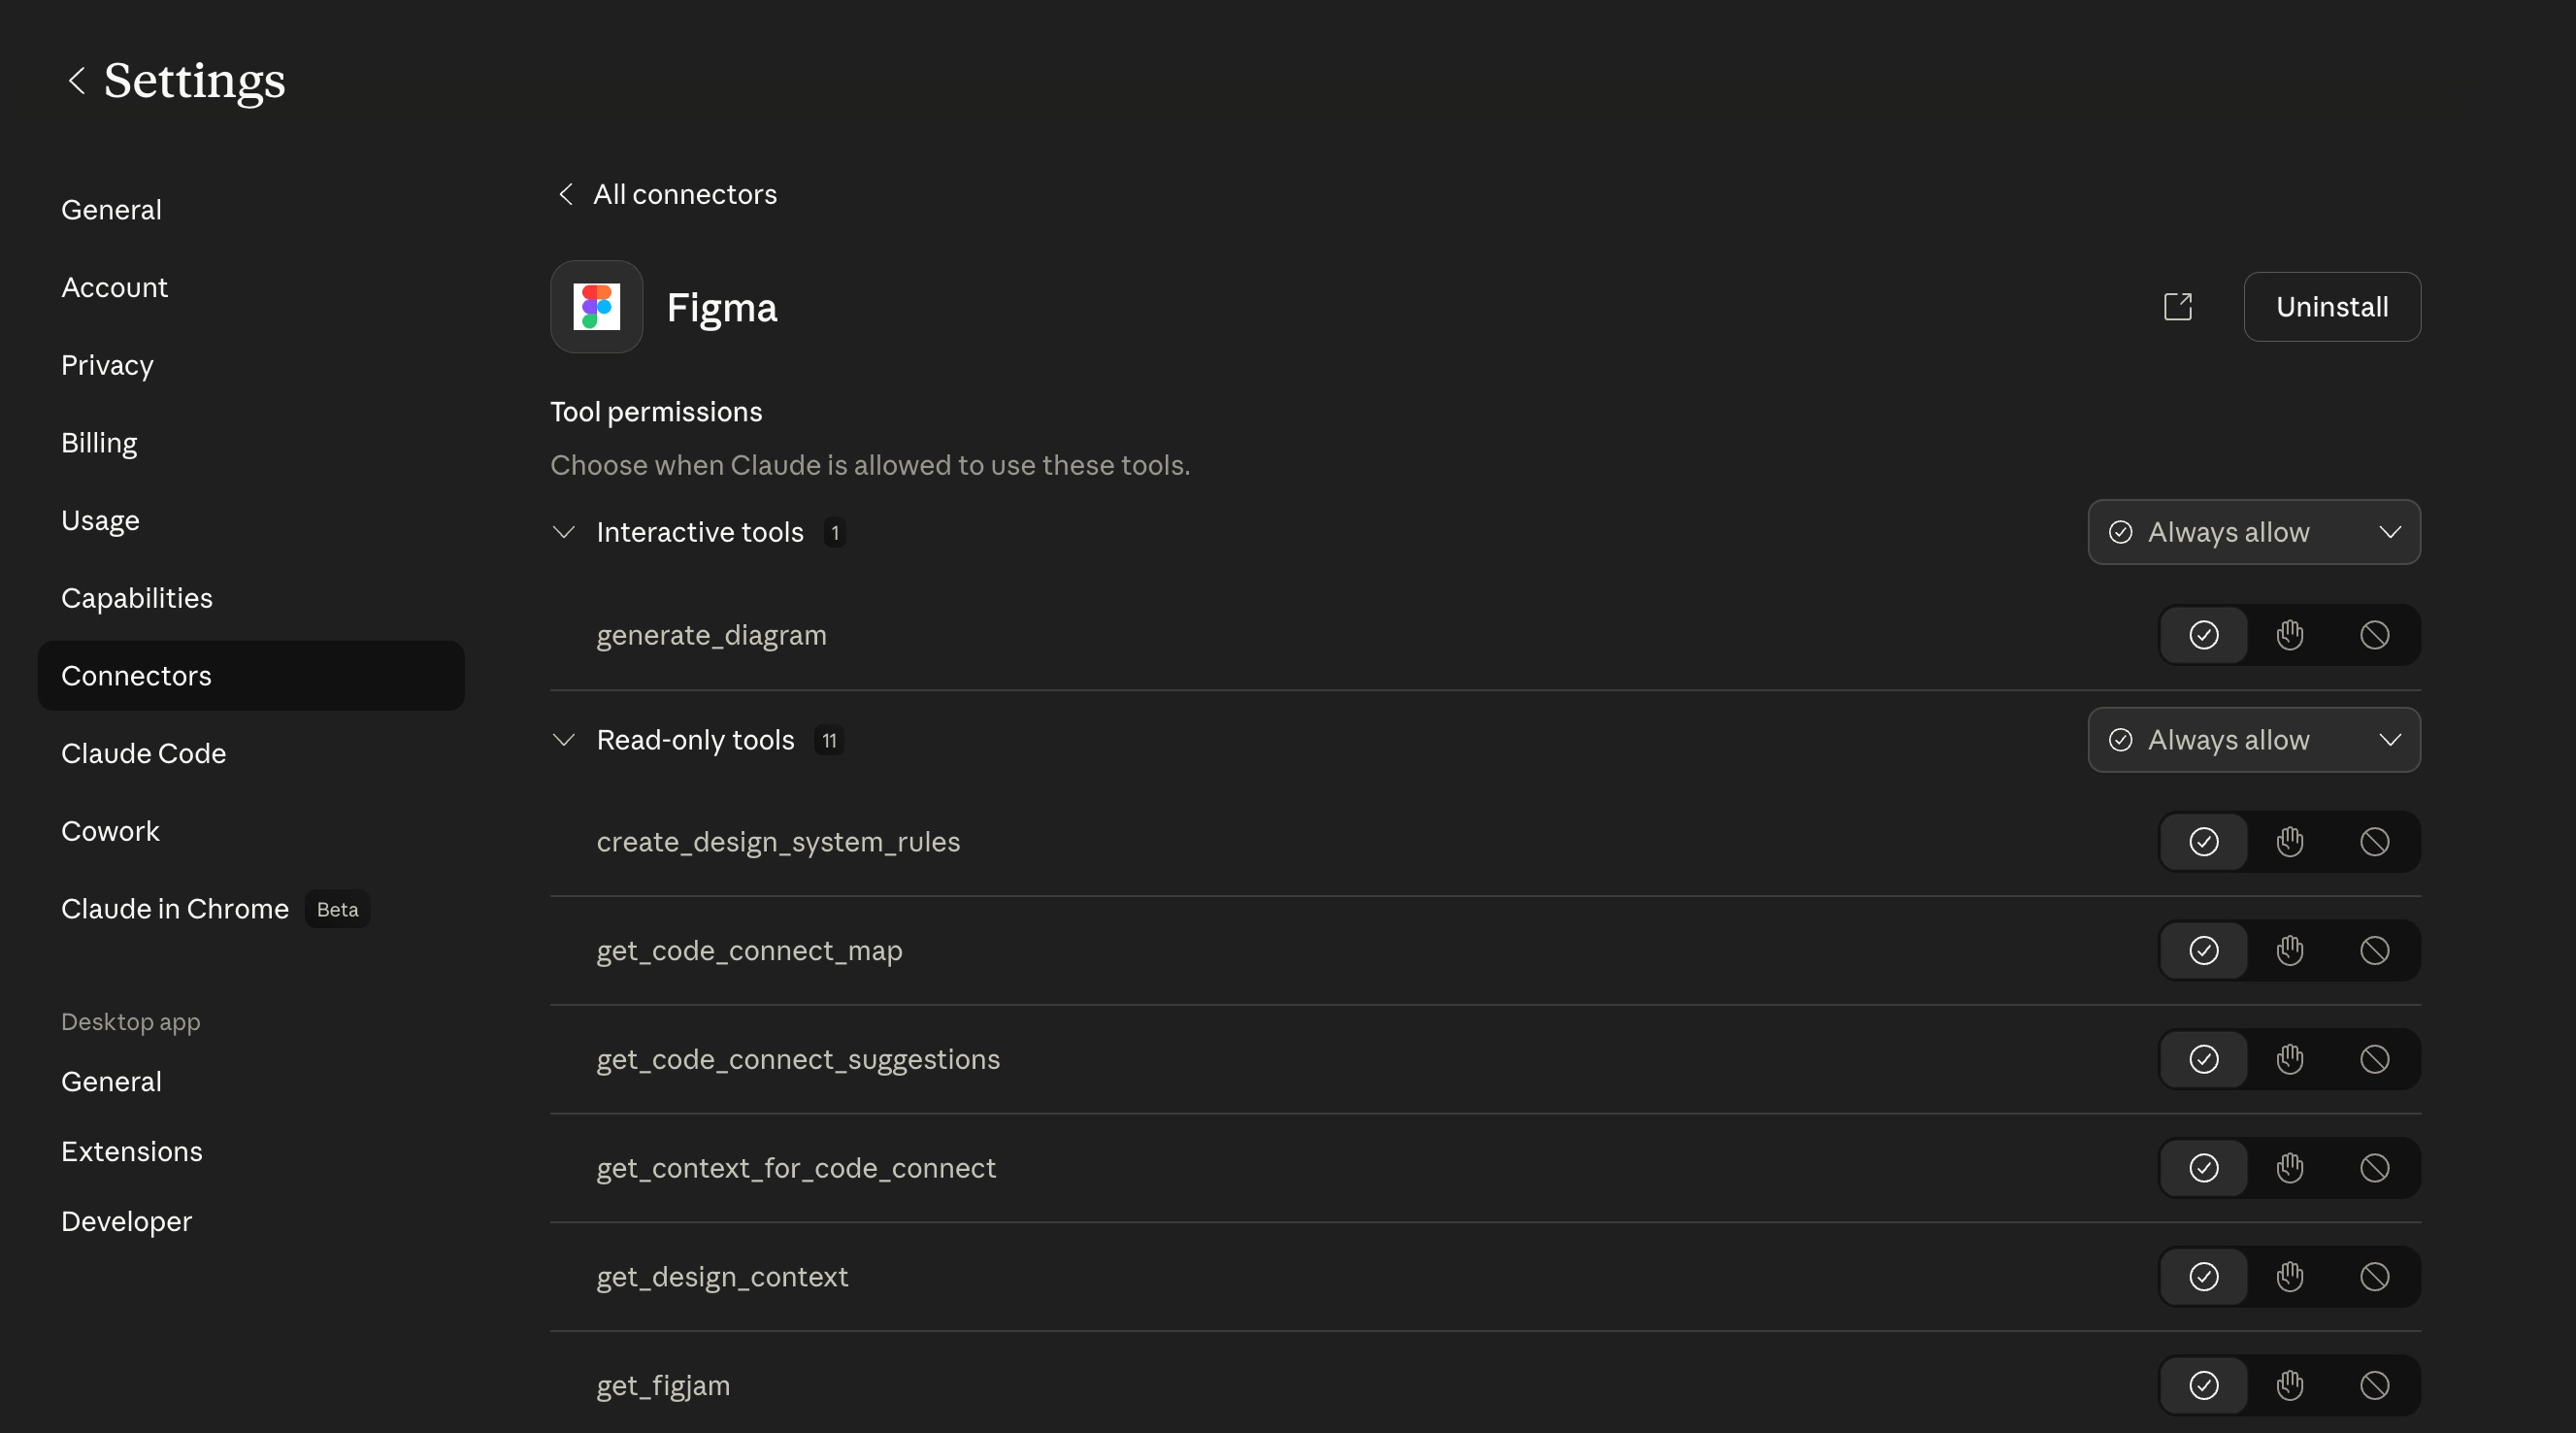
The Figma plugin for Claude Code also comes with built-in skills. A skill is a pre-written collection of prompts that tells Claude how to use the Figma data effectively. When you ask Claude to implement a Figma design, it automatically uses a skill called “Figma Implement Design” that Figma themselves wrote.
The Basic Workflow
Let’s walk through the simplest version of this.
I start with an empty folder in Claude Code. I then go to Figma, select the frame I want to implement (in this case, a dashboard design), and copy the example prompt that appears in the MCP panel. It looks something like: “Implement this design from Figma.”
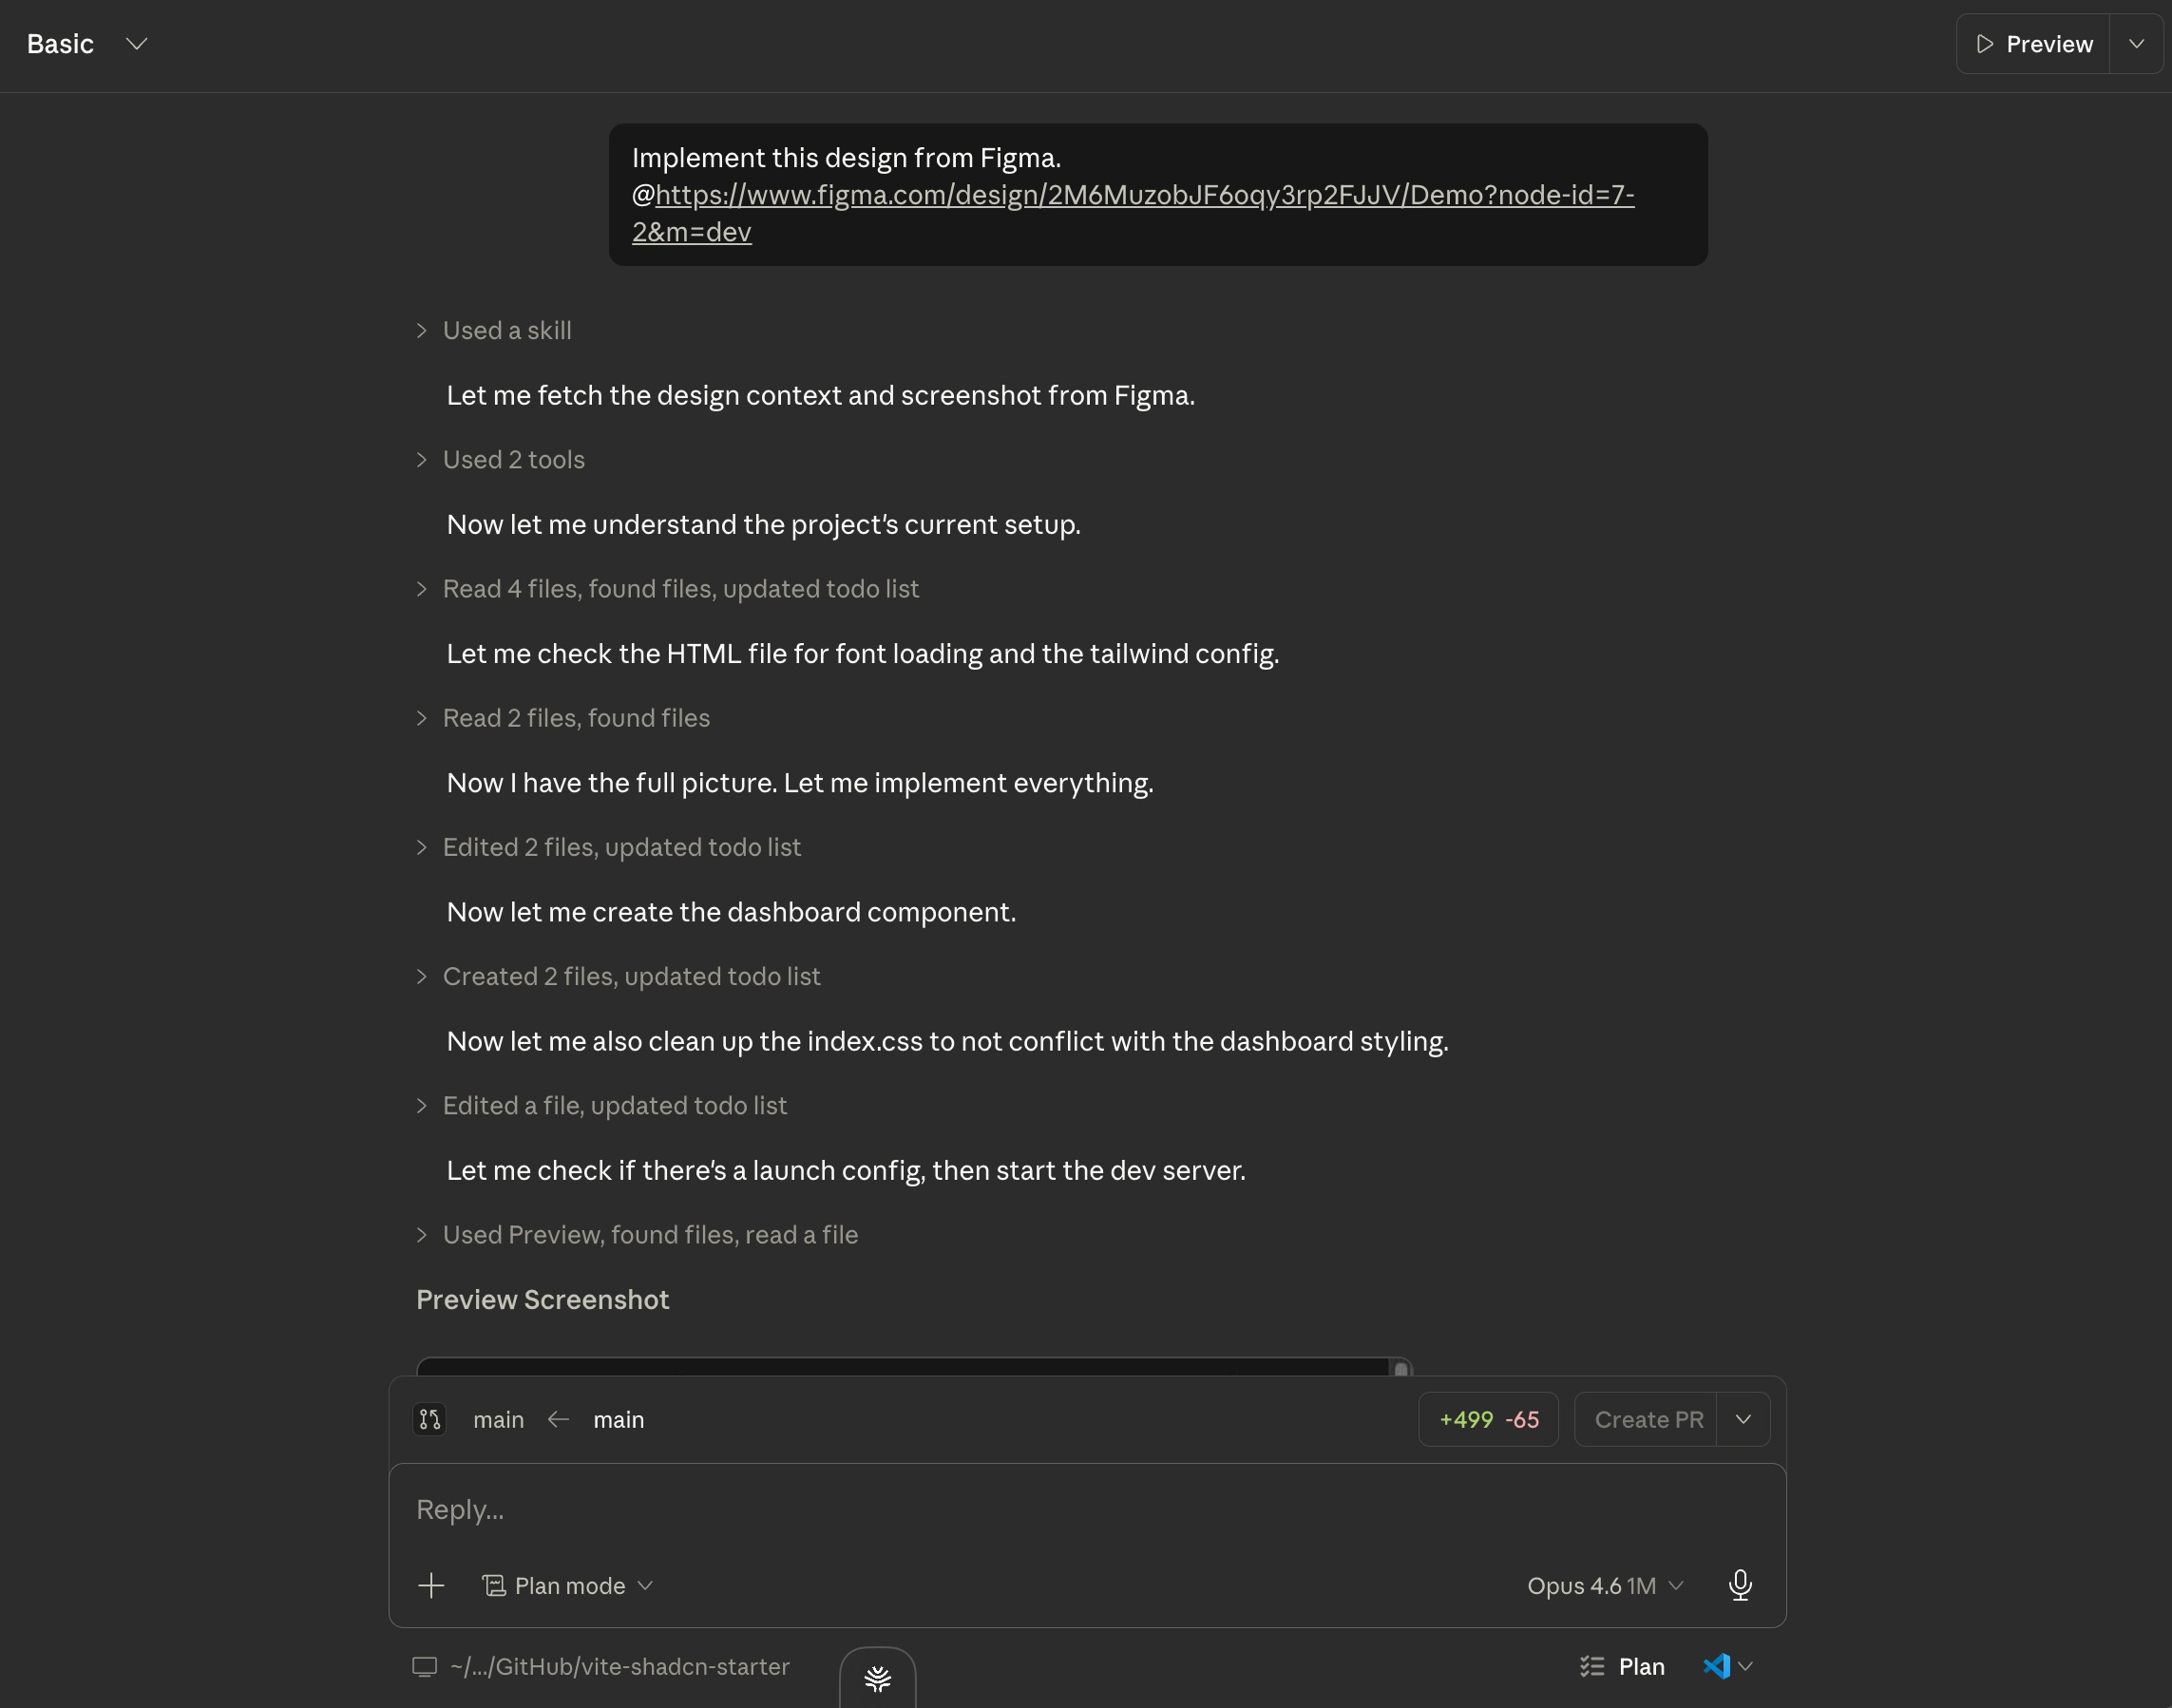
I paste that into Claude Code and hit enter.
What happens next is a series of tool calls. Claude Code reaches out to Figma through the MCP, grabs the design context, downloads a screenshot, exports assets like images and icons, and reads through the component structure. It’s pulling in everything it can to understand the design
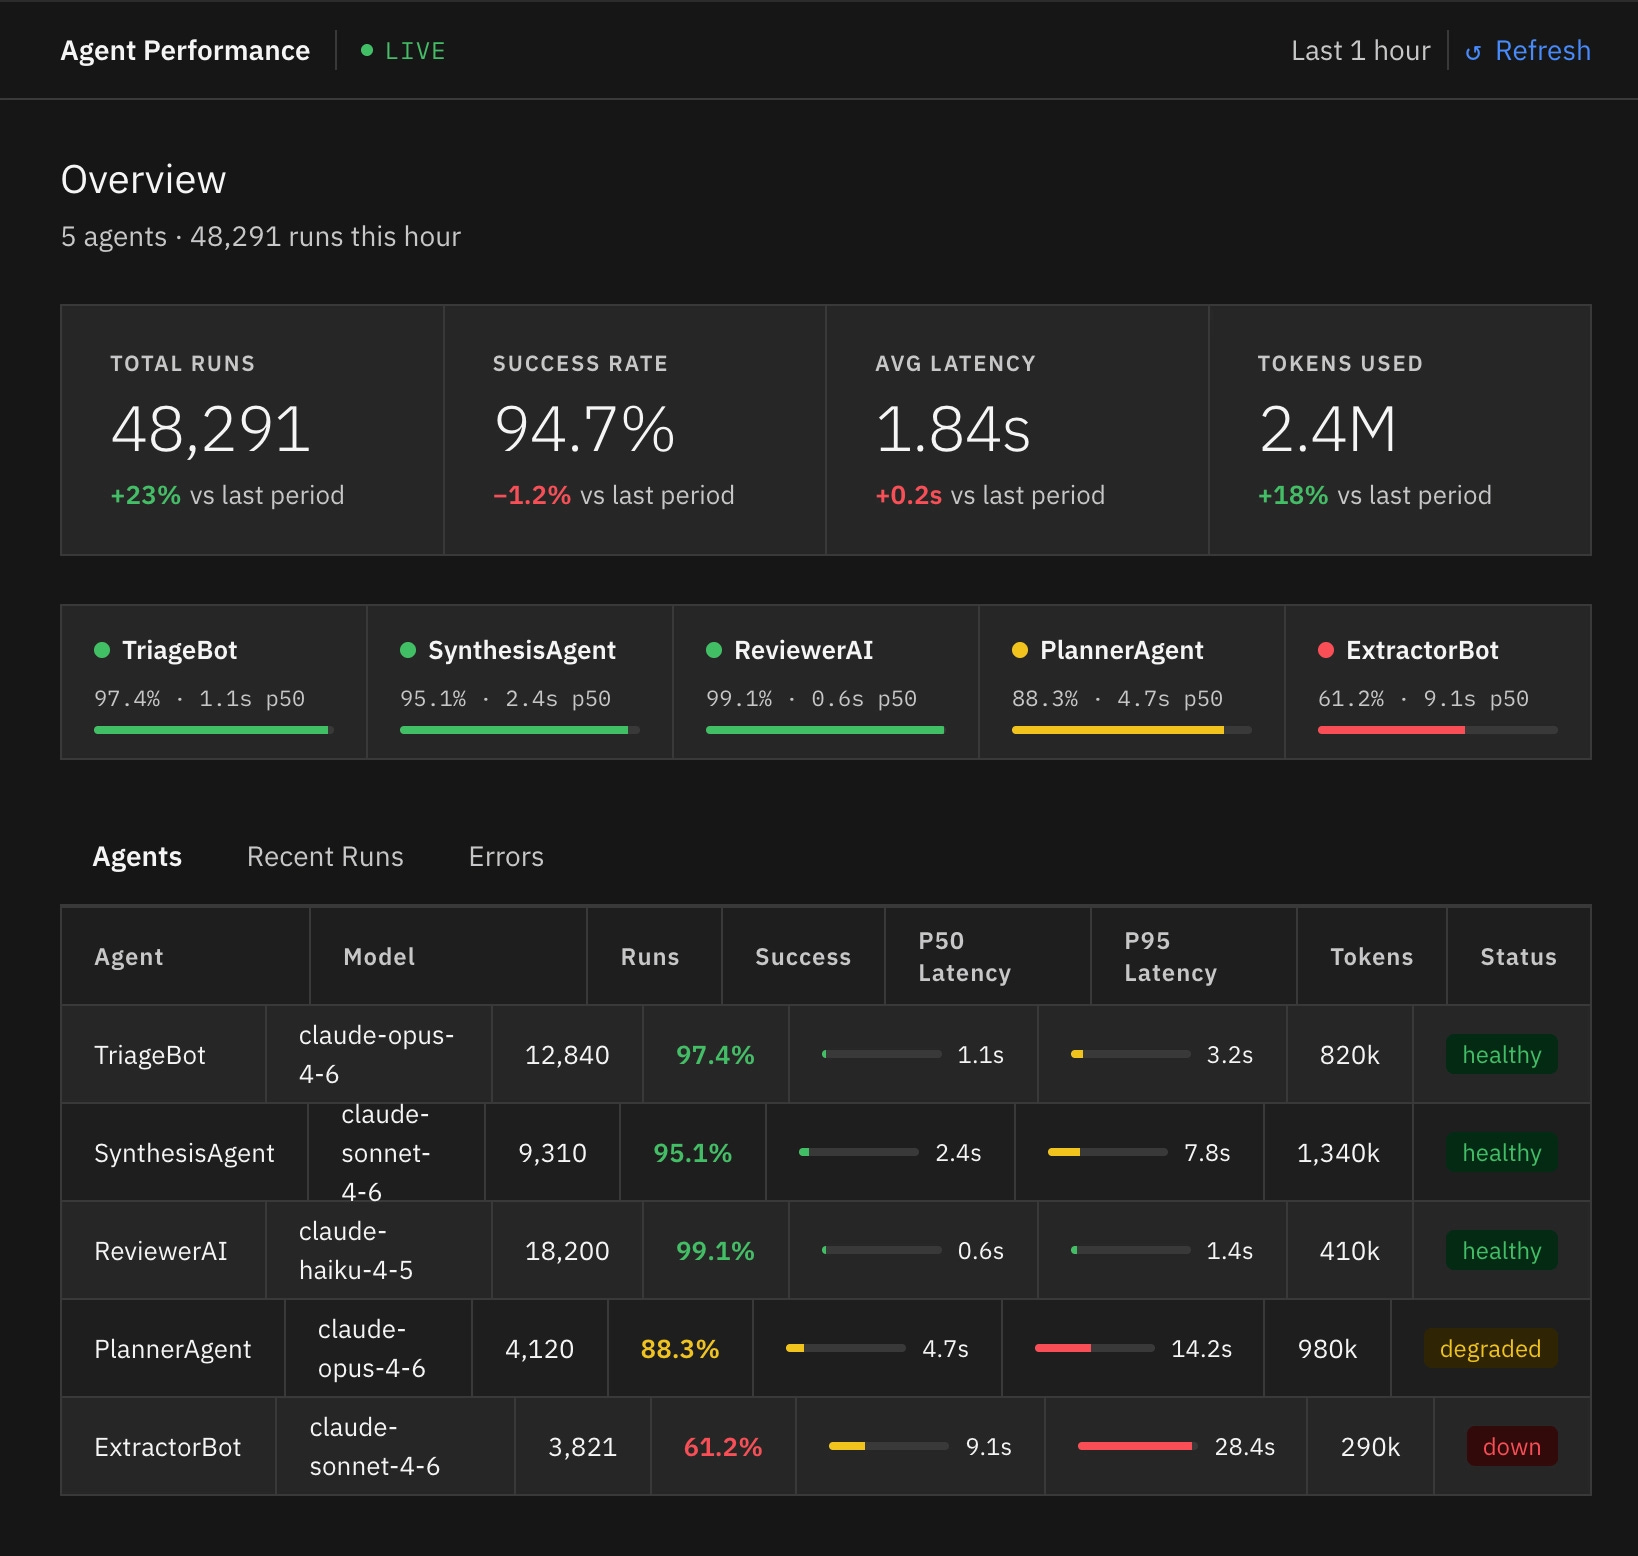
After a minute or so, the prototype is done. Comparing the original Figma mock to the implemented code, it’s 90 percent the same. The layout matches, the components look right, the data is in the right places. You’ll likely notice some differences, such as responsive layout gaps in the table or small changes in the components themselves.
From here, you can keep prompting to prototype any new experience you have in mind. Claude Code is not opinionated about your framework, so you can do this with React, Vue, Angular, or any other framework.
Although this is a quick way to generate a prototype, the quality of the code itself is not great. Claude Code had to reinvent every component used (buttons, badges, cards, etc), rather than reusing the components already in your code base. The basic prototype is still useful for showing your team how an interaction should feel, or for validating a concept with stakeholders, but the code doesn’t save your engineers any time.
Getting Better Results
To get a prototype that’s actually useful to your engineers, you need your design system. Set up a second project that contains your real code components (buttons, card, badges, etc). I’m using IBM’s Carbon design system, but at your company it would be whatever your team has built. The components are sitting in the folder, not being used yet, just available.
Now go back to Figma, copy the exact same prompt, paste it into Claude Code. I’d recommend adding ‘build with my existing components’ to ensure Claude Code doesn’t try to invent new components to use.
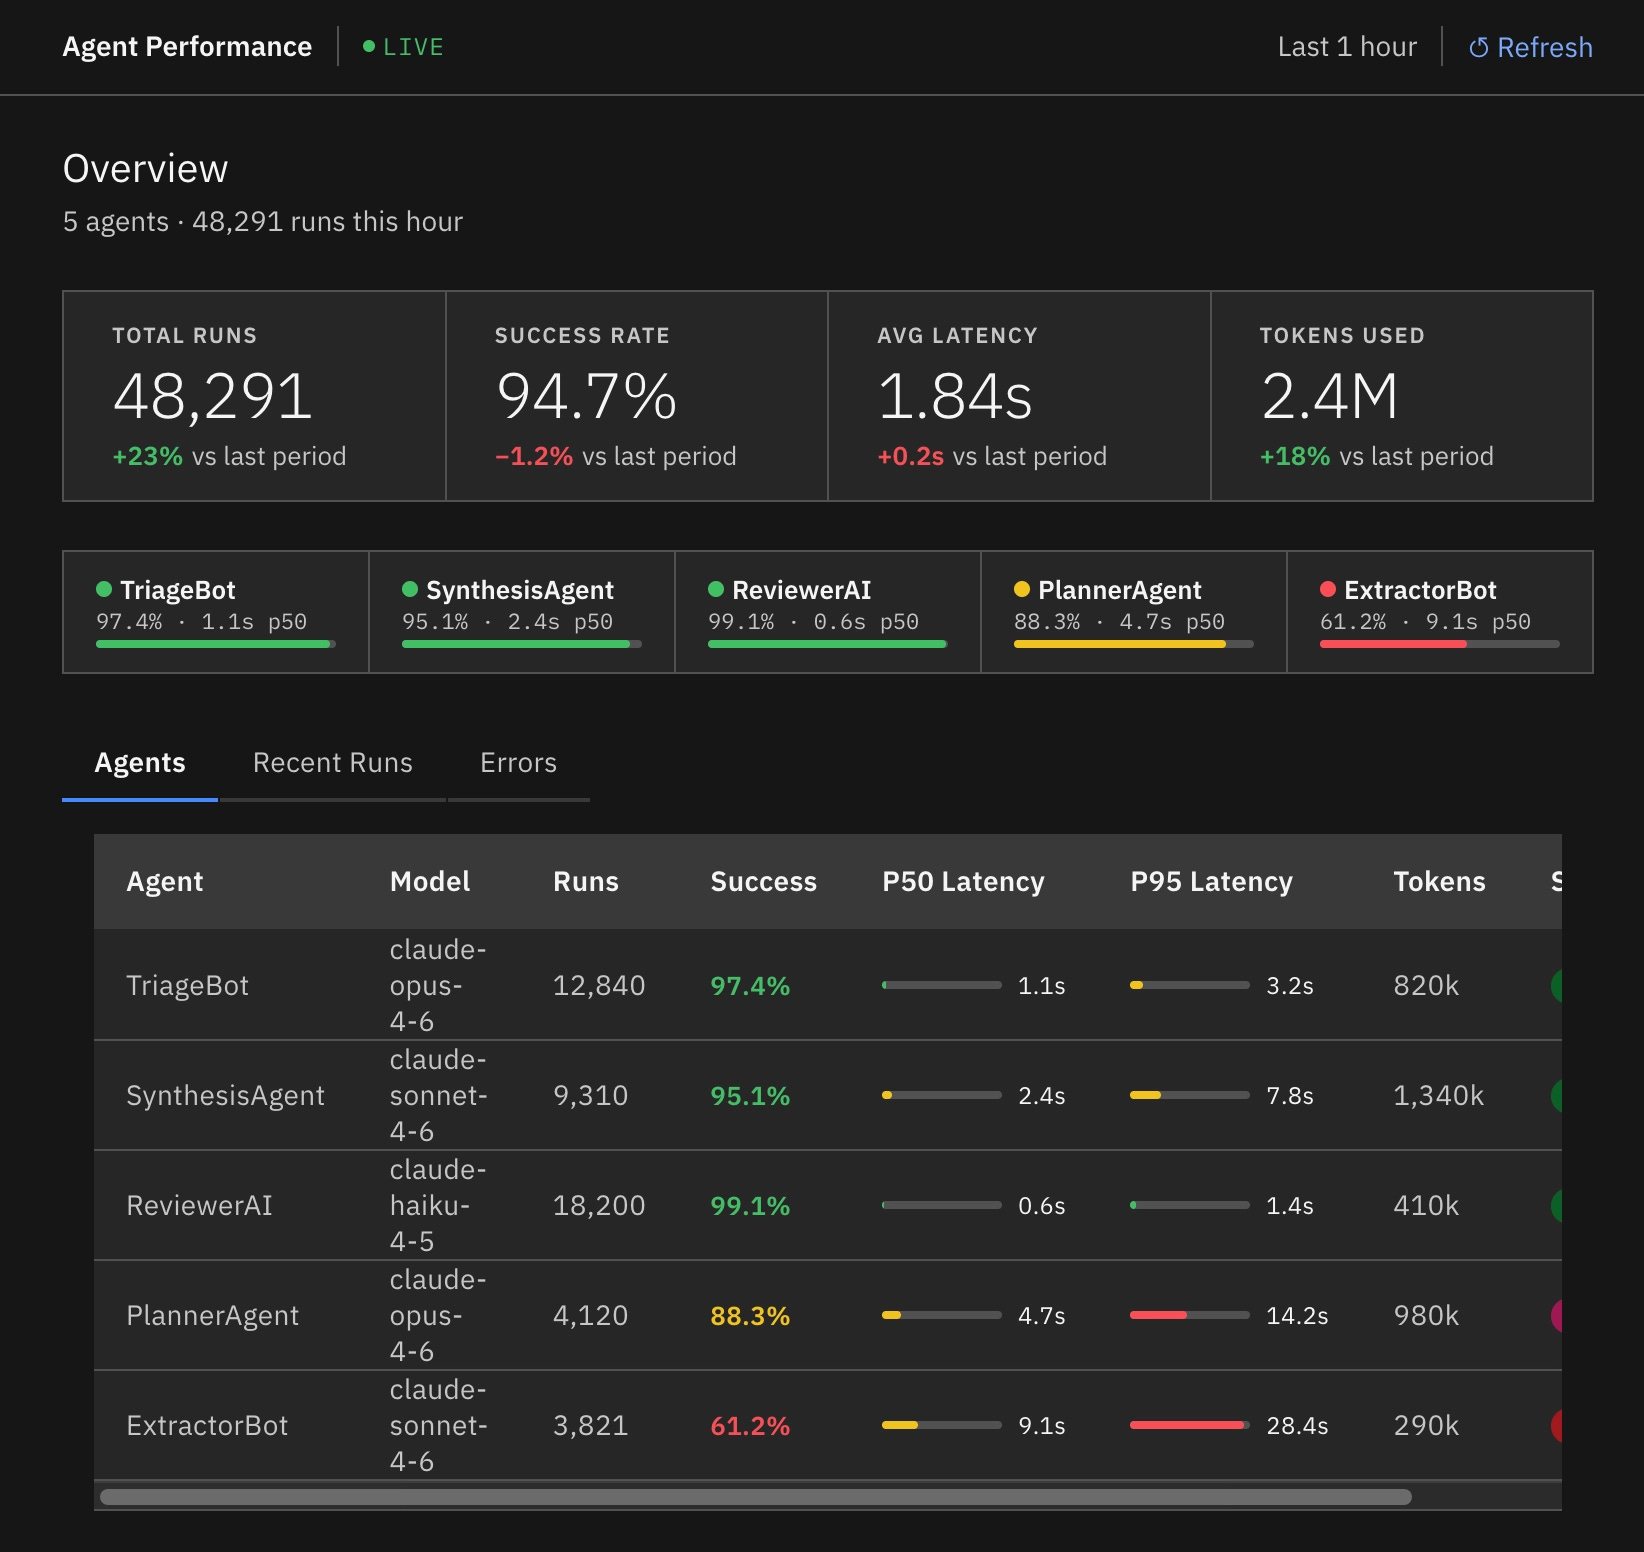
Visually, the output looks almost identical, but the code is now using our real components. You’ll noticed the difference in the table formatting, the tabs, and the cards.
Here’s a small snippet from the beginning of the code that shows these imports:
import {
  Theme,
  Tabs,
  TabList,
  Tab,
  TabPanels,
  TabPanel,
  Tag,
  Table,
  TableHead,
  TableRow,
  TableHeader,
  TableBody,
  TableCell,
} from '@carbon/react';
In the past, most teams would get 80% of the design complete and accept it as good enough. Now, when we hand off to engineering, they get a prototype that they can easily pick up and implement. This allows PMs and designers to speed up implementation and no longer requires engineering to get small details about the design right.
This is the kind of workflow we go deep on in the AI Prototyping course: how to set up your component library, how to handle design systems that aren’t perfectly documented, and how to iterate until the prototype is production-ready. Over 1000 PMs from companies like Meta, Google, Microsoft, and OpenAI have already enrolled.
Check out the full syllabus here!